Install Libreboot on Lenovo ThinkPad R400
- Home
- FAQ
- Download
- Git
- Buy Libreboot preinstalled
- Install
- Docs
- News
- Bugs
- Contact
- Donate
- Other coreboot distros
| Specifications | |
|---|---|
| Manufacturer | Lenovo |
| Name | ThinkPad R400 |
| Released | 2009 |
| Chipset | Intel Cantiga GM45 |
| CPU | Intel Core 2 Duo (Penryn/Merom family) or |
| Celeron M (Merom L family) | |
| Graphics | Intel GMA 4500MHD (and ATI Mobility Radeon HD |
                                                 3470 or nVIDIA
GeForce 9300M on some models) |Memory | Up to 8GB |
Architecture | x86_64 |
EC | Proprietary |
Original boot firmware | LenovoBIOS |
Intel ME/AMD PSP | Present. Can be completly disabled. |
Flash chip | SOIC-8/SOIC-16 4MiB/8MiB (Upgradable to 16MiB) |
W+: Works without vendor firmware;
N: Doesn't work;
W*: Works with vendor firmware;
U: Untested;
P+: Partially works;
P*: Partially works with vendor firmware| Features | |
|---|---|
| Internal flashing with original boot firmware | N |
| Display | W+ |
| Audio | W+ |
| RAM Init | W+ |
| External output | W+ |
| Display brightness | P+ |
| Payloads supported | |
|---|---|
| GRUB | Works |
| SeaBIOS | Works |
| SeaBIOS with GRUB | Works |
Open source BIOS/UEFI firmware
This document will teach you how to install Libreboot, on your Lenovo ThinkPad R400 laptop motherboard. Libreboot is a Free Software project that replaces proprietary BIOS/UEFI firmware.
It is believed that all or most R400 laptops are compatible. See notes about CPU compatibility for potential incompatibilities.
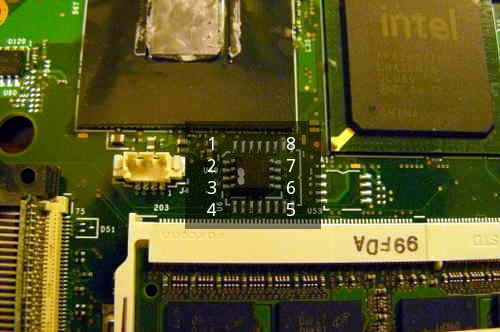
There are two possible flash chip sizes for the R400: 4MiB (32Mbit) or 8MiB (64Mbit). This can be identified by the type of flash chip below the palmrest: 4MiB is SOIC-8, 8MiB is SOIC-16.
The R400 laptops come with the ME (and sometimes AMT in addition) before flashing libreboot. libreboot disables and removes it by using a modified descriptor.
Flashing instructions can be found at ../install/#flashprog
NOTE: Libreboot standardises on flashprog now, as of 27 January 2024, which is a fork of flashrom. The reason why was explained, in the Libreboot 20240225 release
Dell Latitude E6400
If you haven’t bought an R400 yet: the Dell Latitude E6400 is much easier to flash; no disassembly required, it can be flashed entirely in software from Dell BIOS to Libreboot. It is the same hardware generation (GM45), with same CPUs, video processor, etc.
EC update
It is recommended that you update to the latest EC firmware version. The EC firmware is separate from libreboot, so we don’t actually provide that, but if you still have Lenovo BIOS then you can just run the Lenovo BIOS update utility, which will update both the BIOS and EC version. See:
NOTE: this can only be done when you are using Lenovo BIOS. How to update the EC firmware while running libreboot is unknown. libreboot only replaces the BIOS firmware, not EC.
Updated EC firmware has several advantages e.g. bettery battery handling.
The R400 is almost identical to the X200, code-wise. See x200.html.
TODO: put hardware register logs here like on the X200 and T400 page.
Installation notes
External flashing required, if Lenovo BIOS is running.
If you haven’t bought an R400 yet: the Dell Latitude E6400 is much easier to flash; no disassembly required, it can be flashed entirely in software from Dell BIOS to Libreboot. It is the same hardware generation (GM45), with same CPUs, video processor, etc.
Initial flashing instructions for R400.
This guide is for those who want libreboot on their ThinkPad R400 while they still have the original Lenovo BIOS present. This guide can also be followed (adapted) if you brick your R400, to know how to recover.
Before following this section, please make sure to setup your libreboot ROM properly first. Although ROM images are provided pre-built in libreboot, there are some modifications that you need to make to the one you chose before flashing. (instructions referenced later in this guide)
Serial port
EHCI debug might not be needed. It has been reported that the docking station for this laptop has a serial port, so it might be possible to use that instead.
A note about CPUs
ThinkWiki has a list of CPUs for this system. The Core 2 Duo P8400 and P8600 are believed to work in libreboot. The Core 2 Duo T9600 was confirmed to work, so the T9400 probably also works. The Core 2 Duo T5870/5670 and Celeron M 575/585 are untested!
Quad-core CPUs
Incompatible. Do not use.
A note about GPUs
Some models have an Intel GPU, while others have both an ATI and an Intel GPU; this is referred to as “Dual Graphics” (previously “switchable graphics”). In the BIOS setup program for lenovobios, you can specify that the system will use one or the other (but not both).
libreboot is known to work on systems with only the Intel GPU, using native graphics initialization. On systems with switchable graphics, the Intel GPU is used and the ATI GPU is disabled, so native graphics initialization works all the same.
CPU paste required
See #paste.
Flash chip size
Use this to find out:
flashprog -p internalNOTE: Libreboot standardises on flashprog now, as of 27 January 2024, which is a fork of flashrom. The reason why was explained, in the Libreboot 20240225 release
MAC address
Refer to mac_address.html.
External flashing
Refer to spi.html as a guide for external re-flashing.
Disassembly
Remove all screws:
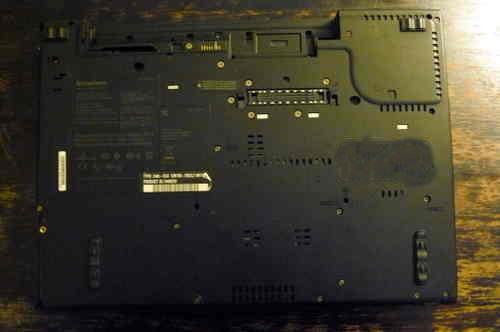
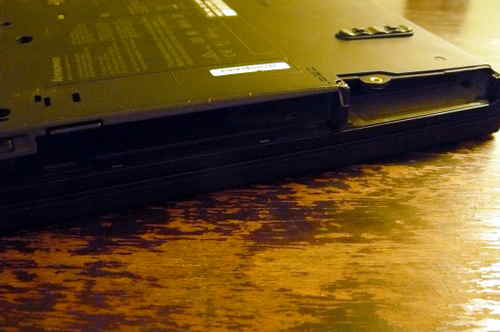
Remove the HDD and optical drive:
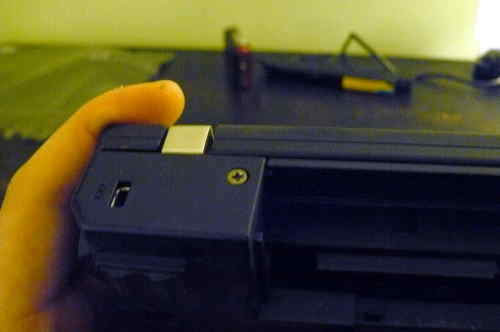
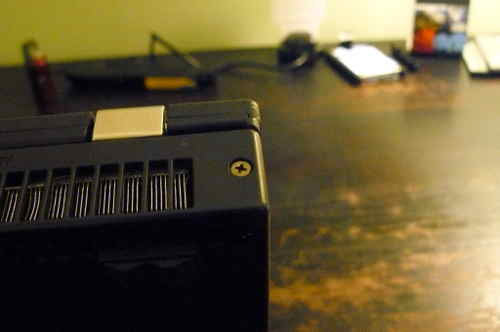
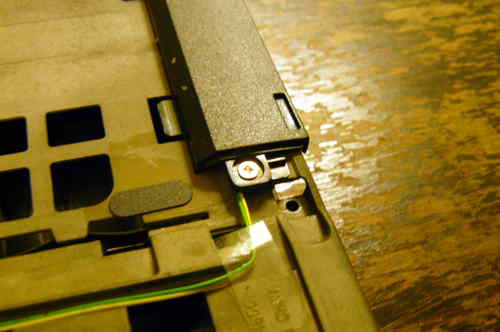
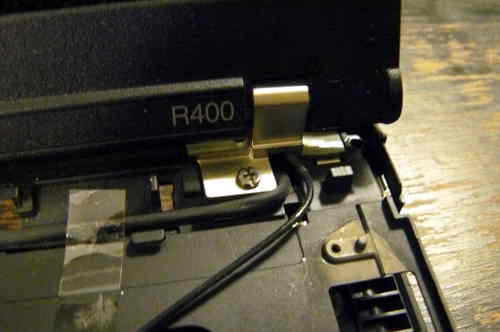
Remove the hinge screws:
Remove the palm rest and keyboard:
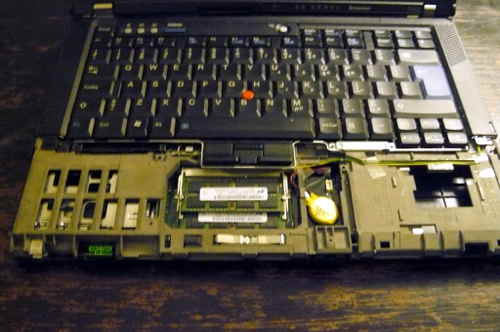
Remove these screws, and then remove the bezel:
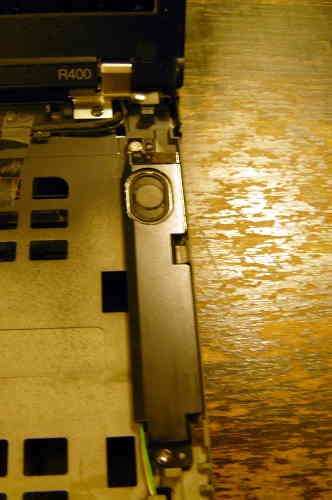
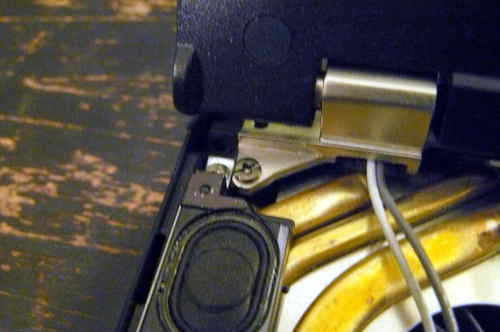
Remove the speaker screws, but don’t remove the speakers yet (just set them loose):
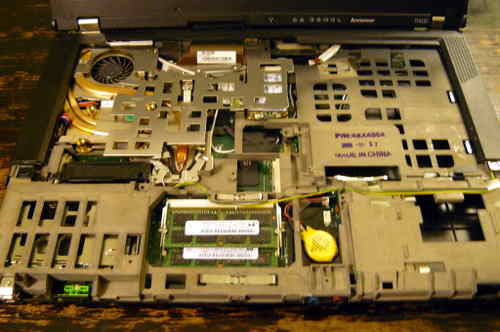
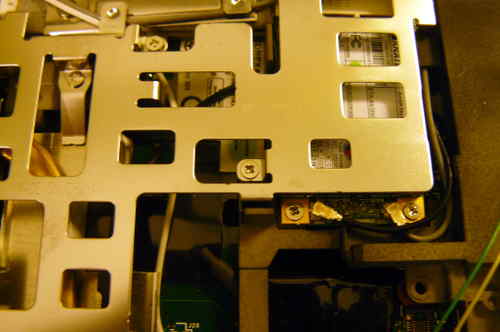
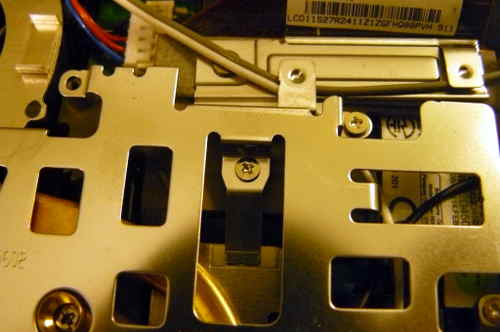
Remove these screws, and then remove the metal plate:

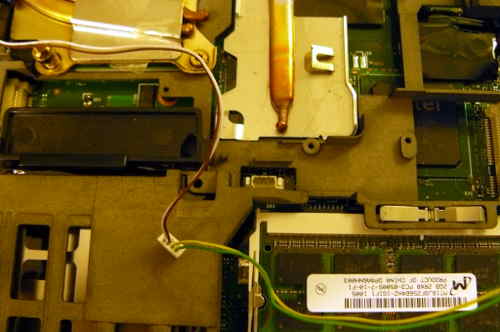
Remove the antennas from the wifi card, and then start unrouting them:
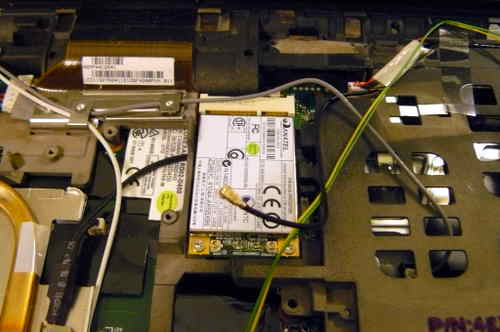
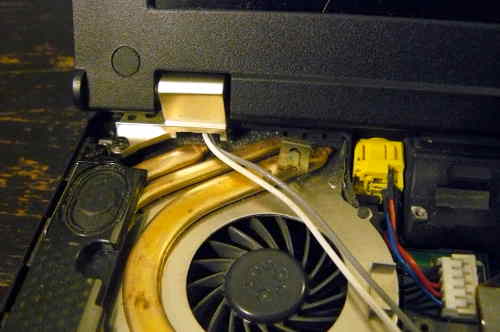
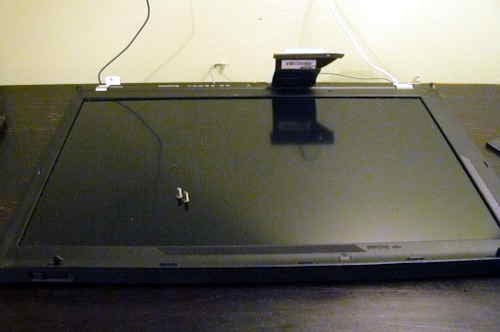
Disconnect the LCD cable from the motherboard:

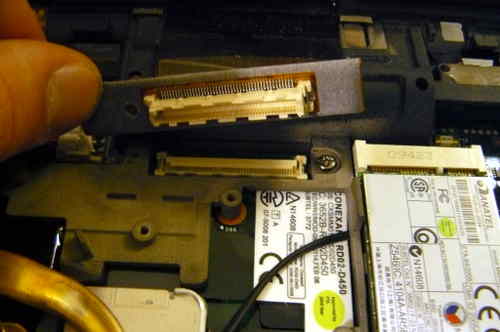
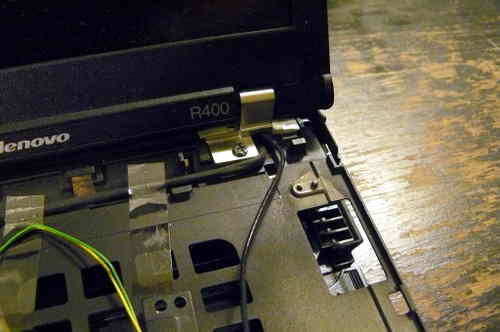
Remove the hinge screws, and then remove the LCD panel:
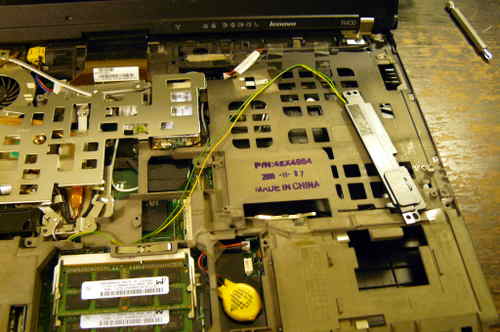
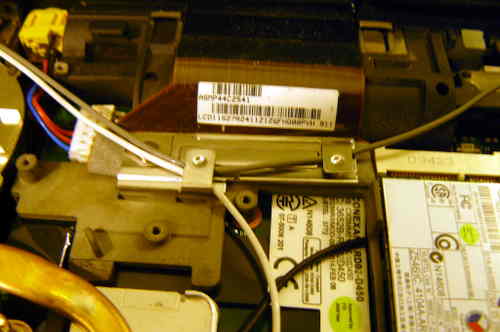
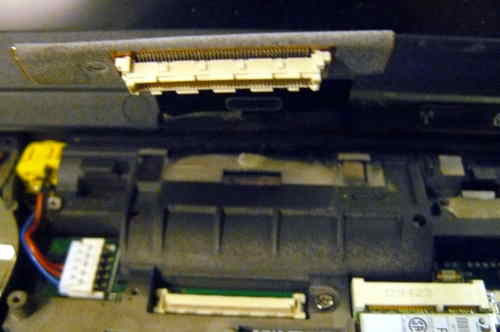
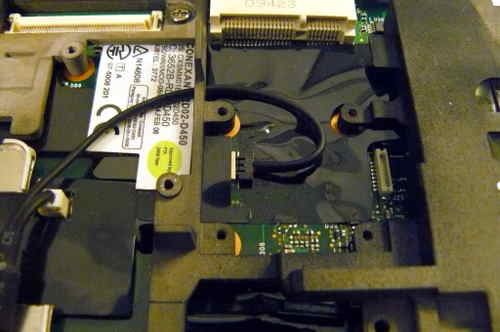
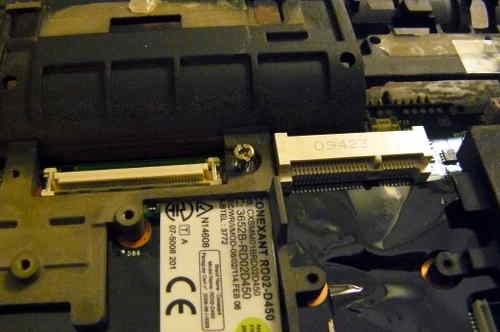
Remove this:
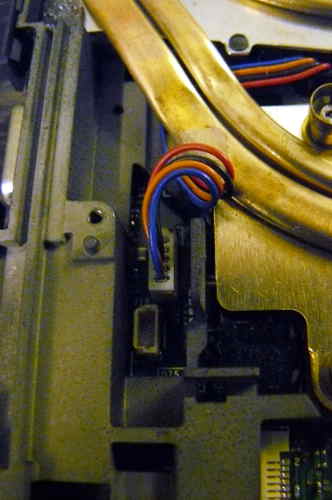
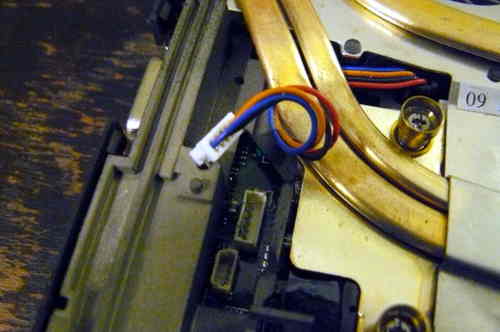
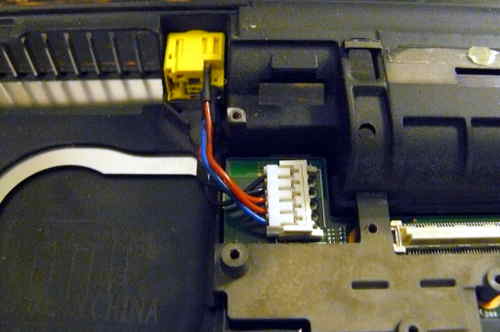
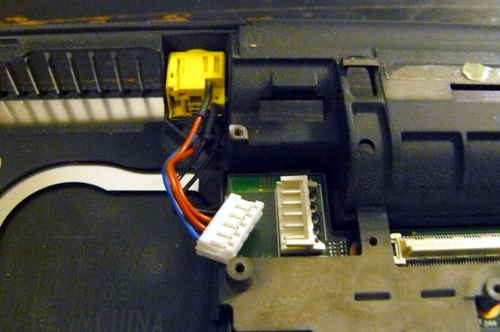
Remove this long cable (there are 3 connections):
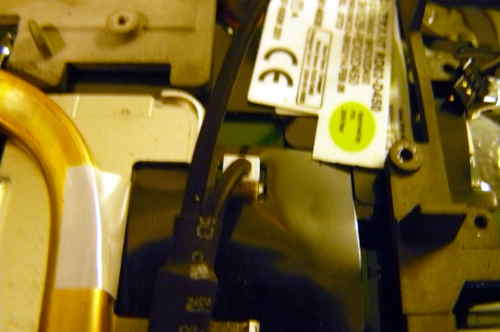
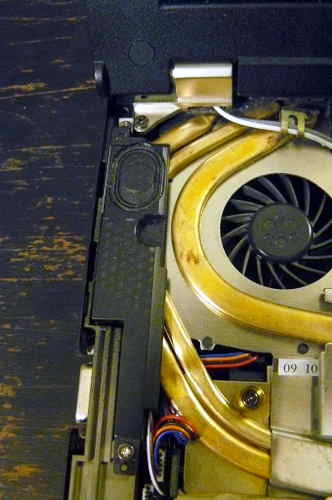
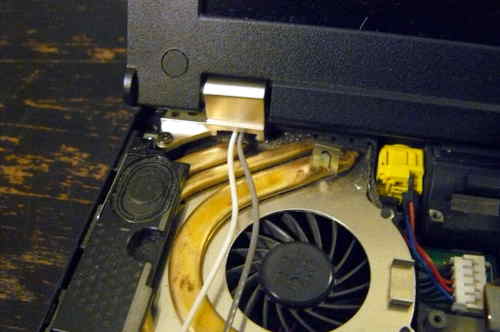
Disconnect the speaker cable, and remove the speakers:
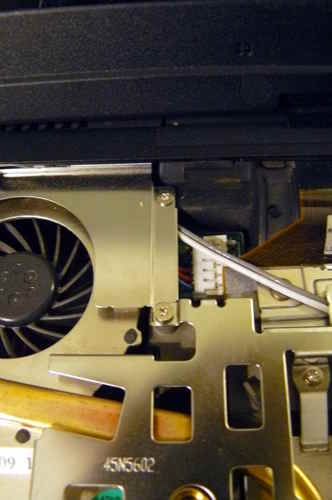
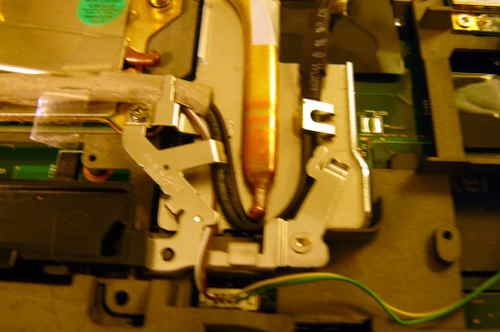
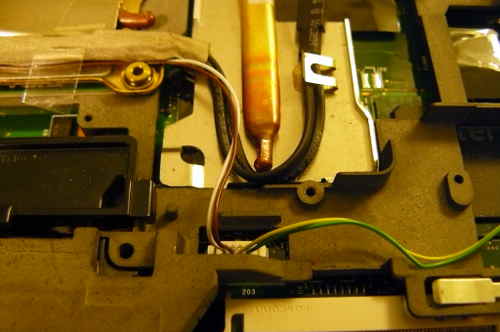
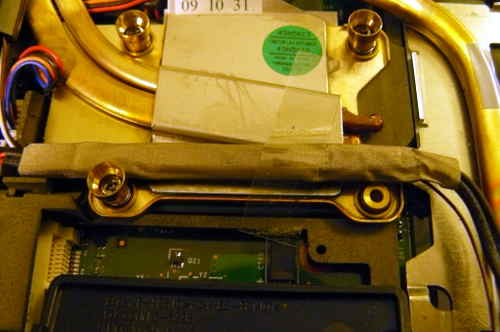
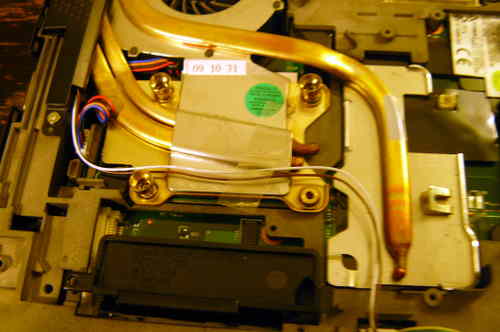
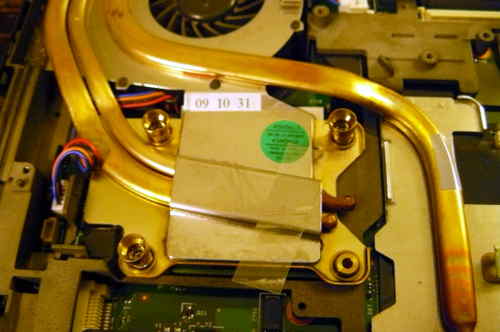
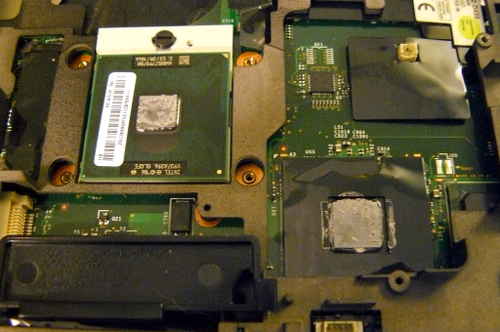
Remove the heatsink screws, remove the fan and then remove the heatsink/fan:
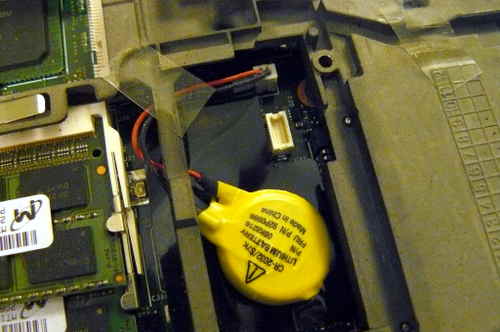
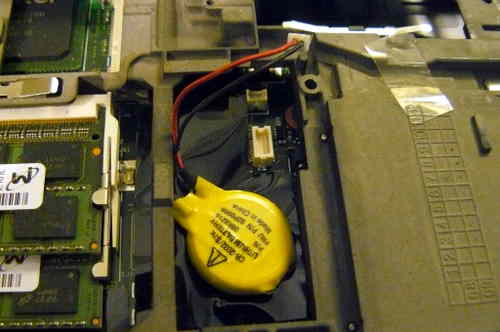
Remove the NVRAM battery:
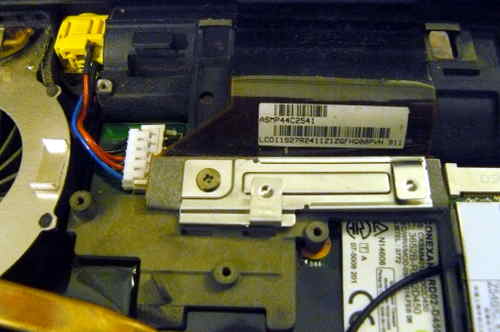
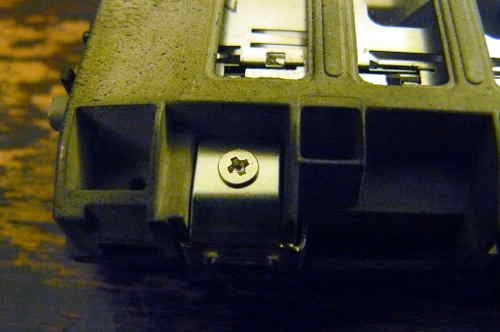
Remove this screw:

Disconnect the AC jack:
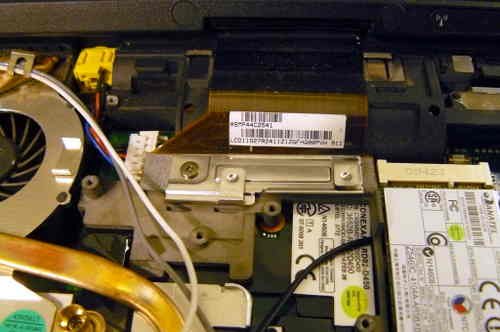
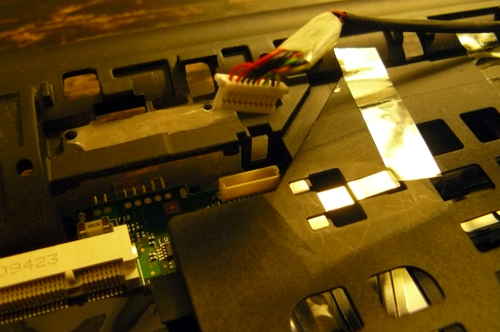
Remove this screw and then remove what is under it:
Remove this:
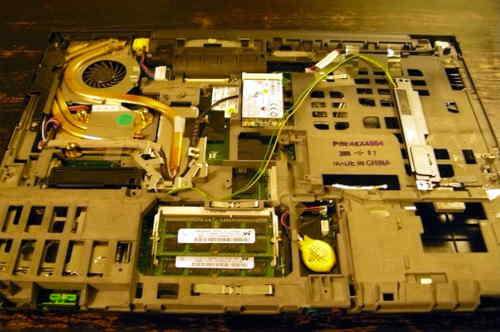
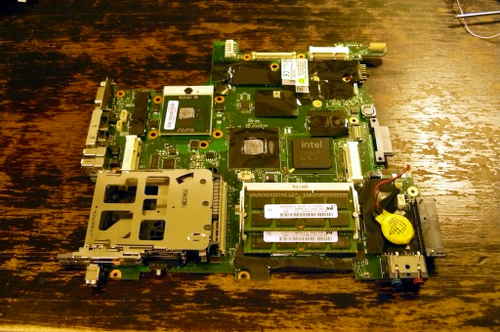
Lift the motherboard (which is still inside the cage) from the side on the right, removing it completely:
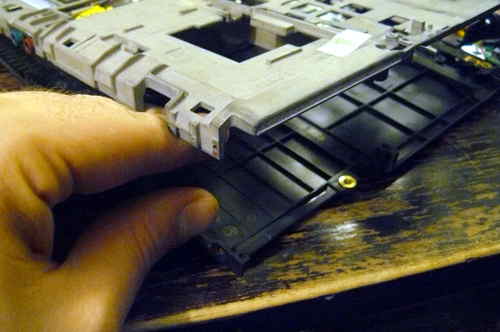
Remove all screws, marking each hole so that you know where to re-insert them. You should place the screws in a layout corresponding to the order that they were in before removal: 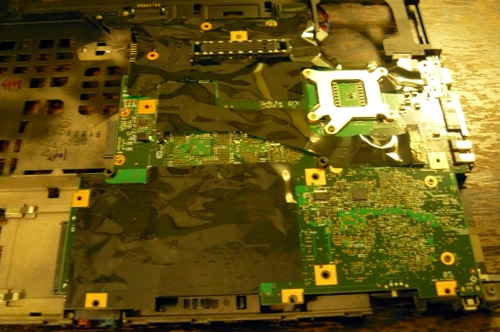
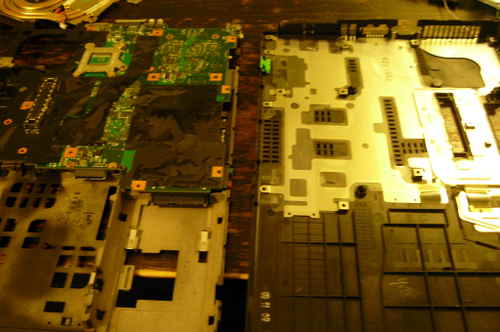
Remove the motherboard from the cage, and the SPI flash chip will be next to the memory slots:
Now, you should be ready to install libreboot.
Read this article to learn how you may flash the chip, which is near to the RAM.
Thermal paste (IMPORTANT)
Because part of this procedure involved removing the heatsink, you will need to apply new paste. Arctic MX-4 is ok. You will also need isopropyl alcohol and an anti-static cloth to clean with.
When re-installing the heatsink, you must first clean off all old paste with the alcohol/cloth. Then apply new paste. Arctic MX-4 is also much better than the default paste used on these systems.
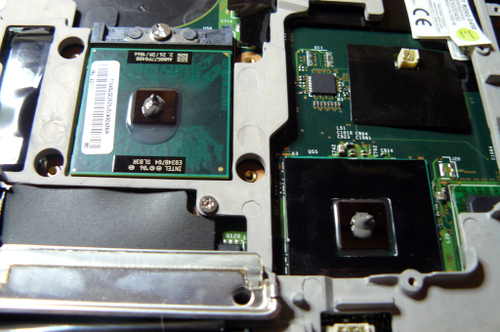
NOTE: the photo above is for illustration purposes only, and does not show how to properly apply the thermal paste. Other guides online detail the proper application procedure.
Memory
In DDR3 machines with Cantiga (GM45/GS45/PM45), northbridge requires sticks that will work as PC3-8500 (faster PC3/PC3L sticks can work as PC3-8500). Non-matching pairs may not work. Single module (meaning, one of the slots will be empty) will currently only work in slot 0.
NOTE: according to users reports, non matching pairs (e.g. 1+2 GiB) might work in some cases.
Make sure that the RAM you buy is the 2Rx8 configuration when buying 4GiB sticks (In other words: maximum of 2GiB per rank, 2 ranks per card).
This page might be useful for RAM compatibility info (note: coreboot raminit is different, so this page might be BS)
The following photo shows 8GiB (2x4GiB) of RAM installed:

Boot it!
You should see something like this:
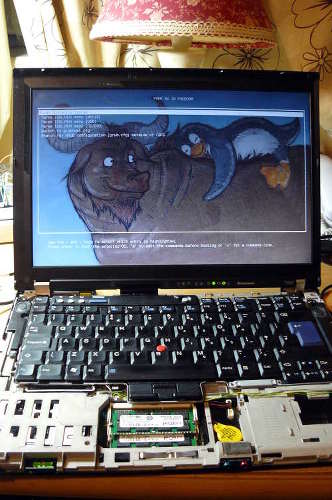
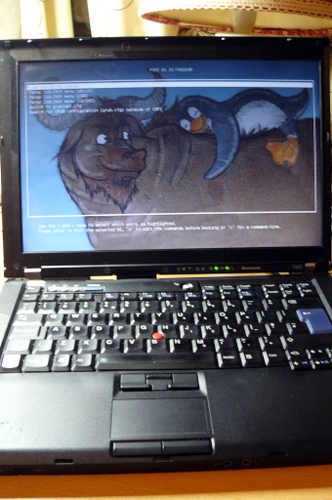
Now install Linux.
Markdown file for this page: https://libreboot.org/docs/install/r400.md
Subscribe to RSS for this site
This HTML page was generated by the Libreboot Static Site Generator.